
Dreamweaver
MX
Macintosh and Windows
|
|
Dreamweaver |
- Where to find this software at Wellesley
- Where is my Properties Inspector? (applies to all Dreamweaver windows)
- Cleaning up Word HTML
- Editing Text
- Inserting special characters (©, ™, Æ, etc.)
- Previewing in a Browser
- Images
- Creating and editing links
- Inserting and linking to anchors
- Creating a table
- Editing a table
- Importing a spreadsheet from another application
- Adding a background color or image
- Adding a Document Title
- Printing your web page
- Search and Replace
- Spell-Check
Dreamweaver is available on all of the computers in the public labs and can be installed on personal and office computers connected to the Wellesley College network. If Dreamweaver is not already installed on your computer, you can install it from the following pages:
All windows in Dreamweaver, including the Properties Inspector and the Insert Palette can be opened from the Window menu.
To open a missing window:
From the Window menu, select the window you would like to open.
If the window you want still won't open:
- From the Window menu, select Arrange Panels.
Many users like creating HTML documents in Microsoft Word. Unfortunately, the HTML that Microsoft Word writes is not very accurate. Dreamweaver provides a function for cleaning up the Word HTML so that you can continue creating your pages in Word.
To clean up Word HTML:
- From the File menu choose Open and then select the Word HTML document that you would like to work on.
- From the Commands menu, choose Clean up Word HTML
- A dialog box will appear with many choices, all of which are checked off by default.
- You can leave the default choices unless you see a choice that you would like to uncheck.
- Click OK
- You will receive a log letting you know what was cleaned up.
- From the File menu, choose Save to save the document.
You can type text directly into the Dreamweaver document window, or you can cut and paste from another application. You should let the lines of text wrap in the Dreamweaver window (don't hit the enter (or return on a Mac) key at the end of every line) so that there will not be any unnatural line breaks when your page is viewed in a browser. (Netscape or Internet Explorer)
Once the text is entered into the document, you can format it using the Properties window. To format it use the following instructions.
To change the format of the text to a Heading, choose the heading you would like from the Format drop-down list in the Properties window.
You can change the font and font size for the text on your page from the Font and Size drop-down lists in the Properties window.
Note: If you choose to change the font and size of the text on your page, make sure you preview it on a Mac and Windows computer using Netscape and IE to make sure that your page looks ok. Different browsers and different computers will display fonts and sizes differently.To make the text bold or italicized, highlight the text you would like to format and click on the bold or italics button in the Properties window.
To align the text on the page (left, right or center) highlight the text and click on one of the Alignment buttons in the Properties window.
To make a bulleted or numbered list you can click on one of the List buttons in the Properties window, type your list and when you are finished, hit the Enter key (or Return key on a Mac) and then click the List button again to get out of the list.
To indent (or outdent) a block of text, use the Indent and Outdent buttons in the Properties window.
- To check the spelling in a document, from the Text menu, select Check Spelling.
- To begin typing on the next line (without skipping a line) hold down the shift key while you hit Enter (Return on a Mac) or from the Insert menu, choose Line Break.
To insert a special character into your document:
- Click once in the location that you would like to place the character.
- From the Insert window, click on the Common drop-down menu, and choose Characters
- Click on the special character that you would like to add.
- If the character you need does not appear:
- Click on the square icon for other characters, or go to the Insert menu, then to Special Characters and click on Other...
- Find the character you need from the window that opens.
- Click once on the character you wish to insert and click OK
To preview your web page in a browser:
OR
- Click on the Earth icon next to the Title: box at the top of your window
- Select Preview in the browser you prefer.
Note: If you get an error message letting you know that your browser cannot be found, choose File > Preview in Browser > Edit Browser List. Here you will be able to reselect the appropriate browser on your computer and add a secondary browser to the list.
Remember that people will be using different computers, browsers, and browser versions to view your pages and they often look different depending on the system. Make sure to test your web pages on both a Mac and a PC.
Working with an image:
Images can be drawn, scanned, or taken with a digital camera. All image editing (changing the dimensions, drawing, etc.) should be done in another application BEFORE you insert the image into your web page. You can use Fireworks (Macintosh and Windows), Graphic Converter (Macintosh) for image editing.
Fireworks can be downloaded to your computer and used if it is connected to the campus network.
To insert an image:
- Make sure your image file is saved in the same folder as your html file.
- In your Dreamweaver document, click in the place where you want the image to appear.
- From the Insert menu, choose Image (or click on the
button in your Insert window)
- In the dialog box that appears, navigate to the image file.
- Highlight the image file and click the Select button.
- The image will now appear in your web page.
Adding an alt label to your image:
An Alt label is a text label for you image. If someone views the page using a browser that does not support images or if the browser is set to have image loading turned off, they will see the alt label in its place. Alt labels are especially important for users with disabilities who are browsing the web using a screen reader.
- Click on the image in your Dreamweaver document.
- In the Properties window find the Alt field

- Type in a short description of your image in the Alt box
To link to another page in your own web site:
- Make sure the file you want to link to is saved in the same folder as your Dreamweaver document.
- In your Dreamweaver document, highlight the text or image that you would like to link.
- In the Properties window, find the Link field.

- To the right of the Link field, there is a small folder (blue on the Macintosh or yellow in Windows).
- Click once on this small folder.
- In the dialog box, navigate to the html file that you want to link to.
- Highlight the file you want and then click on the Select button.
- The file name will now appear in the Link box.
To link to another page on the WWW:
- In your Dreamweaver document, highlight the text or image that you would like to link.
- In the Properties window, find the Link field.
- Type in the ENTIRE URL for the link (example: http://www.somewebsite.com) into the Link box.
- If you don't want to type the URL into the box, you can copy and paste the URL from your browser (Netscape or Internet Explorer). To do this:
- Go to the web page in your browser and highlight the ENTIRE URL.
- From the Edit menu, choose Copy.
- Close your browser.
- In your Dreamweaver document, make sure the text that you want to link is highlighted.
- In the Properties window, right-click (PC) or hold down the control key and click (Mac) in the Link box and choose paste.
An anchor is a "marker" for a section of a web page. Anchors are very useful in long web pages, or web pages that naturally break themselves into sections.
For instance, this documentation has anchors inserted at the beginning of each topic. The table of contents at the top of this page links to these anchors. When you click on the link for Inserting and linking to anchors at the top of this page, it will bring you to the Inserting and linking to anchors section of the page.
To insert an anchor:
- Click once in the location that you would like to "mark" with an anchor.
- From the Insert menu, choose Named Anchor
- Type a name in the Anchor Name dialog box and click OK
A yellow shield with an anchor will appear in your document where the anchor was inserted.
Note: This shield will NOT appear when you view the page in a browser.
To make a link to an anchor:
- In your Dreamweaver document, highlight the text or image that you would like to link.
- Leaving the text or image highlighted, use the scroll bars on the right-hand side of your document window to scroll until you can see the anchor
- In the Properties window, find the Link field.
- To the right of the Link field, there is a small wheel.
Click and drag this small wheel over the anchor.
- Let go of the mouse when the wheel is positioned over the anchor.
- Your document will "flip" back to the text or image that you had highlighted and it will be underlined and blue, showing that it has been linked.
To insert a table:
You can type text directly into the table cells, and you can paste, or import text and images. You can format the text in a table in the same ways that you can format it in the rest of your Dreamweaver document. Highlight it and then use the Properties window to change the style, color, etc. (See Editing Text for more help.)
Note: When viewed in a browser (Netscape or Internet Explorer), the table cell size will reduce horizontally to fit the content of the cells. If you don't want this, click on the vertical cell dividers in your Dreamweaver document and drag them to adjust them.
You can edit the properties of the entire table, or you can edit just pieces of the table (rows, columns, or individual cells).
To edit the properties of the entire table:
- Click on the table border. (Hover your mouse over the border of the table. You will see a two-way or four-way arrow when you are able to click on the table border.)
- You will see the entire table outlined in black when it is selected.
- In the Properties window, you will see a picture of a table to let you know that you can edit the table properties.
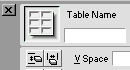
You can change the number of rows and columns in your table by entering the correct number in the Rows and Cols fields.
You can change the alignment of the table on the page (left, right, center) by choosing an alignment from the Align drop-down menu.
You can increase the "heaviness" of the border by entering a number in the Border box. (To have an invisible border, enter 0 in the Border box. You will see dotted lines in your Dreamweaver document, but they will not show in a browser.)
You can choose a background color for your table by clicking on the BG color box When you click on this box, a palette of colors will appear. Select the color you want. Note: if you do not see this box on your Properties Inspector, look in the lower right corner of the Properties Inspector. You should see a little down-arrow. Click on this arrow to "open" the Properties Inspector.
- You can choose border colors by clicking on the other color boxes in the Properties window (Brdr, Light Brdr, Dark Brdr)
- To sort the data in the table, from the Commands menu, choose Sort Table... A dialog box will pop up with sorting options. Choose your sorting options and then click OK. Note: Tables with merged cells are not sortable.
To edit the properties of a single row of the table:
- Let your mouse hover to the left of the row you want to edit until the cursor turns into a black arrow pointing towards the row.
- When this black arrow appears, click with your mouse to highlight the row.
- You will see the row outlined in black when it is selected.
- In the Properties window, you will see a row highlighted in the table picture.
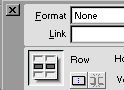
This isn't the actual row you are working on! It is a "generic row" just to let you know that you can edit the row properties!
- Many of the format options in the Properties window for a row pertain to the text contained in that row. For instance you can set text style, color etc. (See Editing Text for more help)
You can merge all of the cells in your row into one long horizontal cell by clicking on the Merge button in the Properties window.
To separate a merged row into separate cells, click on the Split button in the Properties window and in the dialog box that pops up, enter the number of columns that you would like it broken into.
To edit the properties of a single column of the table:
- Let your mouse hover over the column you want to edit until the cursor turns into a black arrow pointing down at the column.
- When this black arrow appears, click with your mouse to highlight the column.
- You will see the column outlined in black when it is selected.
- In the Properties window, you will see a column highlighted in the table picture.
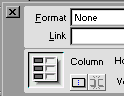
This isn't the actual column you are working on! This is a "generic column" just to let you know that you can edit the column properties!
- Many of the format options in the Properties window for a column pertain to the text contained in that column. For instance you can set text style, color etc. (See Editing Text for more help)
To edit the properties of a single cell of the table:
- Click in the cell that you want to edit.
- In the Properties window, you will see a cell highlighted in the table picture.
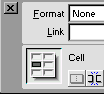
This isn't the actual cell you are working on! This is a "generic cell" just to let you know that you can edit the column properties!
- Many of the format options in the Properties window for a cell pertain to the text contained in that cell. For instance you can set text style, color etc. (See Editing Text for more help)
To edit the properties of more than one row, column, or cell at the same time:
Hold down the shift key while you are selecting the different table parts.
Dreamweaver will allow you to import a spreadsheet (such as Microsoft Excel) into your document and have it automatically formatted as an HTML table.
To import a spreadsheet:
You can format the table data, and sort and format the table like any other table in Dreamweaver. (See Editing a table for more help.)
When you create your web page in Dreamweaver, the default color of your web page background is white. You can change your background to a different color, or use an image for the background of your web page.
To change the color of your background:
- From the Modify menu, choose Page Properties
- Click once on the Background Color Box
to open up a palette of colors.
- Move the Eyedropper to the color you would like to select and click once.
- If this is the color that you would like to use, click OK
To use an image for your background:
- From the Modify menu, choose Page Properties
- Click on the Browse button to the right of the Background Image field

- Browse to find the image file you would like to use.
- Highlight the image file when you find it and click on the Select button.
- Click OK
Note: If the image that you have selected is not as large as your web page, it will TILE to fill the entire space! Test your page by Previewing in a Browser to make sure you have your desired results.
Before you save, give your page a Document Title. The Document Title appears in the blue bar at the top of your browser window when you view your web page. If you do NOT give your page a Document Title, the browser window will say Untitled Document.
To enter a Document Title:
- Enter a Document Title in the Title: box in the toolbar above the page editing window.
To print your web page:
Note: You cannot print your web page directly from Dreamweaver. You can print the html code if you wish: from the File menu, choose Print code....
Dreamweaver provides an excellent search and replace function. You can choose to search throughout one page, or throughout an entire site folder (The folder must be saved on your own local computer.) You can search for pieces of text, or pieces of HTML.
To search and replace text or HTML:
- From the Edit menu, choose Find and Replace
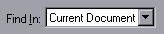
- From the Find In: pull-down menu, choose the location you would like to search (document, web site, or folder)
- From the Search For: pull-down menu, choose what you would like to search (text, or HTML)
- In the next field, type the text or HTML that you would like to find.
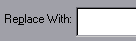
- Type the replacement text or HTML in the Replace With: field
- Check the Match Case checkbox if it is required.
- Click on the Find Next, Find All, Replace, or Replace All button
- Click on the Close button when you are finished searching and replacing.

