
Dreamweaver
MX
Macintosh and Windows
|
|
Dreamweaver |
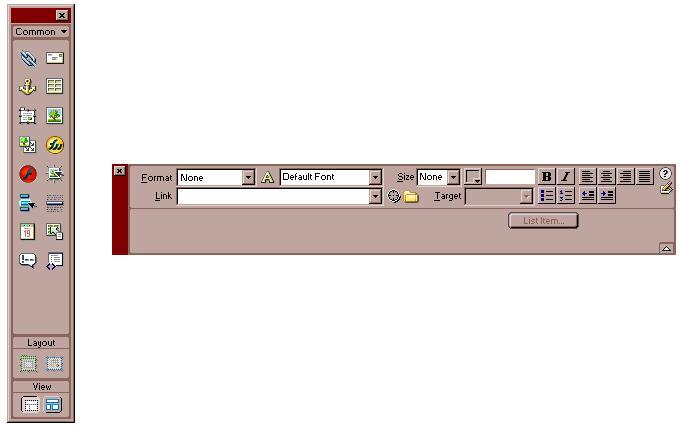
![]() Dreamweaver MX is a visual editor
for creating and managing Web sites and pages. With Dreamweaver, it is easy
to
create and edit cross-platform, cross-browser pages. Dreamweaver provides
advanced design and layout tools and allows users to utilize Dynamic HTML
features, such as animated layers and behaviors, without writing code.
Dreamweaver MX is a visual editor
for creating and managing Web sites and pages. With Dreamweaver, it is easy
to
create and edit cross-platform, cross-browser pages. Dreamweaver provides
advanced design and layout tools and allows users to utilize Dynamic HTML
features, such as animated layers and behaviors, without writing code.
- Descriptions of the Dreamweaver documentation pages
- Where to find this software at Wellesley
- The first time you launch Dreamweaver
- Learning how to use Dreamweaver
- Starting a new web page or web site
- Editing files that already exist
- A word about images
- Saving and naming files
- How to quit
- Uploading your pages to the web
- Where to find more help
Dreamweaver for Beginners
This page includes information on downloading and installing Dreamweaver, the basics of beginning a new website and editing a current website. No specific features are explained here.
Basic Features
This page includes instructions for working with Text, Images, Links, and Tables as well as document features such as backgrounds and document titles. Productivity features such as Previewing, Printing, Spell-check, Search and Replace, Cleaning up Word HTML and importing spreadsheets are also covered.
Menus and Media
This page includes instructions for creating graphic menus such as image maps, rollovers, nav bars and jump menus as well as inserting media files such as Flash and Quicktime.
Site Management Features
This page includes instructions for using some of Dreamweaver's site management features such as site maps, link checking, the History Palette, commands, libraries and templates. These features are not necessary for creating a web site, but can improve efficiency.
Forms
This page includes instructions for creating web forms using Dreamweaver.
Dreamweaver is available on all of the computers in the public labs and can be installed on personal and office computers connected to the Wellesley College network. If Dreamweaver is not already installed on your computer, you can install it from the following pages (please note: the links below are to install Dreamweaver 8):
The first time you open Dreamweaver, you should edit the preferences so that you can use the program most efficiently.
- First, when you are asked to register, click Don't remind me.
- When Dreamweaver asks you to choose a Workspace layout, click in the circle under the Dreamweaver 4 option and click OK. You can change the Workspace later in Preferences.
- Next, click on Preview in Browser. If there is no browser specified, click on the + icon to add one, then click on Choose and navigate to Netscape Communicator or Internet Explorer, whichever is your preference (you may also add more than one browser to the list). After you have located the browser from your hard drive, click Done, then check Primary browser to set it as the default, then click OK.
- Click OK in the preferences window to save your changes.
When you first open Dreamweaver, you will see a blank document named "Untitled Document" and several separate editing palettes. You should keep open the main document window, the Insert palette (vertical palette on the left of the screen), and the Properties inspector (horizontal palette on the bottom of the screen), but you may close the others to decongest your screen. You can reopen any of these windows at any time by selecting them from the Window menu.
As you move the cursor across the icons in each palette, notes will appear, explaining the function of each button. The Dreamweaver menus and palettes include many text-editing tools and features that will help you design web pages with images, links, tables, frames, forms, layers, and more.
Before starting a new webpage, create a new folder on your computer to hold all of your web page files. This includes all of your html files (created in Dreamweaver) as well as any image files (.jpg or .gif) that you are including on your web pages. Dreamweaver expects that you will save all of your files to one "site folder".
If you do not already have a copy of the web page on your computer, you will need to download the page to your computer so that you can edit it. There are two ways to do this:
The easiest way to download a single HTML page is to locate the page using Netscape. When you are looking at the page in Netscape, from the File menu, choose Save As.
|
Windows (PC):
| |
|
Mac:
|
Note: You can also download your page using Internet Explorer. If you choose to do this, in the save window find the Save as Type menu and choose Web Page, HTML only.The second way to download the page to your computer is to use Fetch (Mac) or WinSock FTP (Windows).
Remember that any images that were part of this web page page are separate files. If you download just the html file to edit, the images won't show up in Dreamweaver because they are still stored on the web server, not on your computer. You don't need to worry about this because the HTML code on your page points to the location of your images on the web server. If you edit only the text and then upload your file to the same location on the web server when you are done, the pointers will still locate the images and they should show up as usual.
Once you have the file on your computer:
- Launch Dreamweaver
- From the File menu select Open
- Navigate to your file and click Open.
Working with images takes some care. All of your images must be created and edited outside of Dreamweaver. Dreamweaver cannot edit images.
In order for various web browsers to see them, these images should be in the GIF or JPEG file formats. If you have images that you want to use but you need to convert them from another format (PICT, TIFF etc.) or resize them, you can use any one of several graphics applications such as Graphic Converter (Macintosh) or Fireworks (Windows or Macintosh). Photoshop and Illustrator are also available in the Knapp Center and in the PNE Media Lab.
If you want to draw your own images or make banner headings that include text and graphic elements, you can use Fireworks (Windows or Macintosh). Other ways to find images for your pages are to scan them from printed copies, use a digital camera, or use public domain clip art that you can find on the web or purchase.
Once your images are created, save them all inside the website folder that you created for your website and follow the instructions for inserting images on the Basic Features page.
Before you save, give your page a Document Title. The Document Title appears in the blue bar at the top of your browser window when you view your web page. If you do NOT give your page a Document Title, the browser window will say Untitled Document.
To enter a Document Title:
- Enter a Document Title in the Title: box that appears in the toolbar at the top of the page editing window.
To save your file:
- From the File menu, select Save.
- In the Save as window, type the name you wish to assign to your document.
- Make sure the file name is followed by the extension .html (example: file.html)
Note: The standard at Wellesley is for all web-page filenames to have the extension .html. Filenames should consist of all lower-case characters with no spaces. The underscore symbol can be used to separate words. (Example: file_with_long_name.html)
- Make sure to save your file to the folder you created to hold all of the files for this website. Note: If you're saving an existing file, save it to the same folder you opened it from. If you save your file into a different folder, links and image links will be broken. Make copies of files and move them on your desktop, not in Dreamweaver.
On a Macintosh, select Quit from the File menu. On a PC, select Exit from the File menu.
Note: If you close the only open document window, Dreamweaver thinks that you want to quit out of the program. A dialog box will pop up to warn you. If you want to continue to receive the reminder, do not choose Don't remind me.
The pages you create in Dreamweaver are files that are saved on your computer. In order for them to be "live" on the internet and available to the world you will need to upload the pages to a web server.
Instructions for Faculty/Staff and Students are different. Select the appropriate link to learn more about the uploading process.
Faculty and Staff
Instructions on getting a provider account, and uploading your pages.
Students
Instructions on uploading a Student Organization page.
Instructions on getting a personal account and uploading your pages.
With Dreamweaver
- In Dreamweaver, from the Help menu, choose Using Dreamweaver for a list of help topics.
- Faculty and Staff can call the HelpDesk for support at x3333
- Students can visit a Cluster Consultant or a Computing FirstAid Consultant
- Post to Computing Questions
More Web Resources
A longer list of resources is available in the CWIS Providers Handbook page.